188_257-198_980-271_Side Curtain Kits_MG TC, TD, TF_Instructions.doc
Created on 11/18/2005 4:15:00 PM Created by grantm
319
320
321
322
323
324
325
326
327
328
329
330
331
332
333
334
335
336
337
338
339
340
341
342
343
344
345
346
347
348
349
350
351
352
353
354
355
356
357
358
359
360
361
362
363
364
365
366
367
368
369
370
A good clean work area is essential along with a
sacrificial piece of clean plywood ideally at least
as large as the largest side curtain cover..
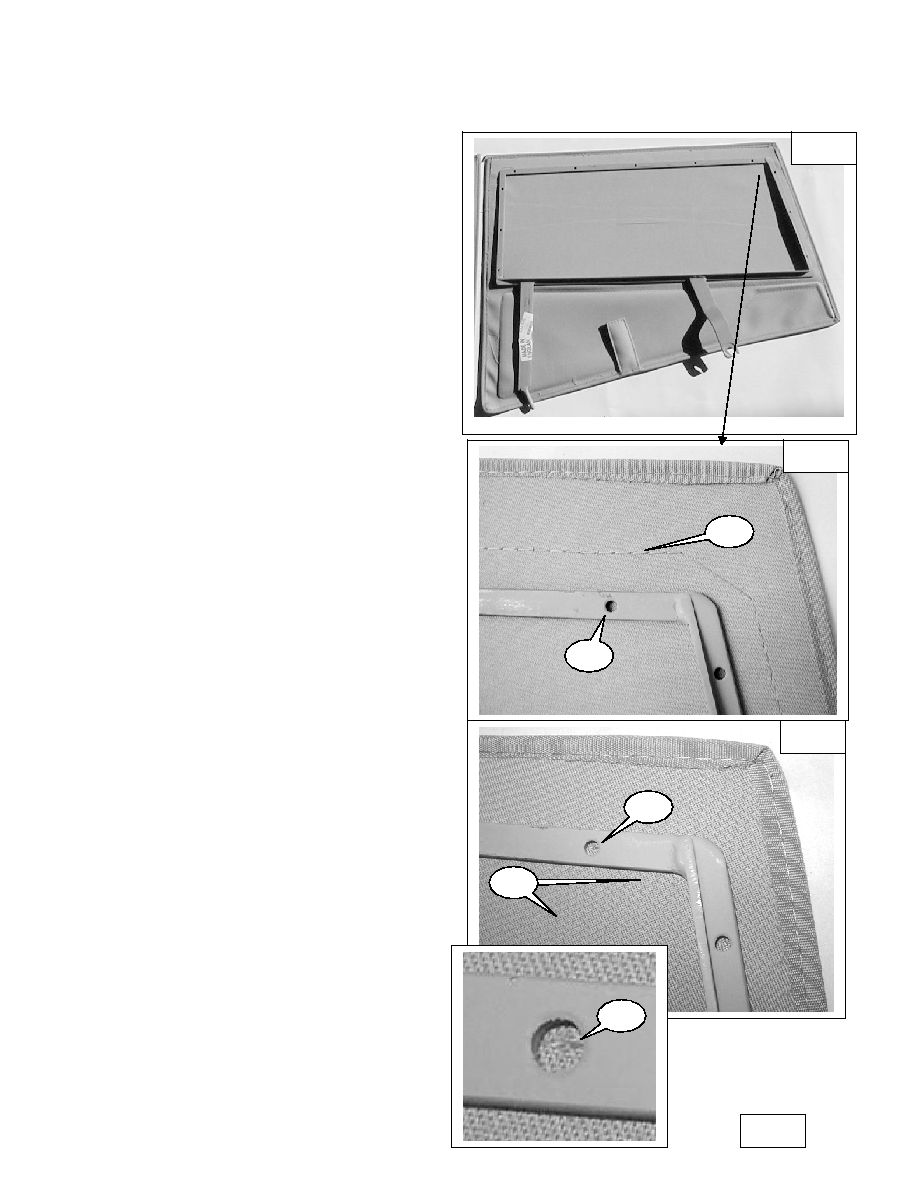
Lay a front side curtain cover on the work surface,
with the outer surface facing down.
Lay the frame over the cover.
Note the holes (6A) for the trim strip mounting
hardware.
Locate the stitch line inset from the edge of the side
curtain cover. (6B).
Carefully center the trim strip fixing bolt holes over
the inner stitch line of the cover. (Fig 7A)
This stitch line should ideally lie directly under the
center of each fixing bolt hole. (7B)
The frame position can be adjusted slightly but the
stitch line must not extend into the “window
area” (7C)
Total possible adjustment on an ideal frame is only
approx. ¼”. Only if necessary should the inner
stitch line be visible outside of the frame. (7D)