MGTF SEAT RECOVERING . . . 1
by John Crawley
alittlemoreink@hotmail.com
11/06/2007
The Moss
instructions for covering the TF seats are a bit on the sparse
side. To begin with they suggest that it is a complex process
that should not be undertaken by and amateur. I found that using
just a few upholstery techniques a fairly decent job can be
done
by one who is willing to give it a try. I have illustrated the
process with
photographs
(pix) and will try to keep the description to a minimum. This is
not a step by step instruction manual but might help you over
the rough spots. If you need help
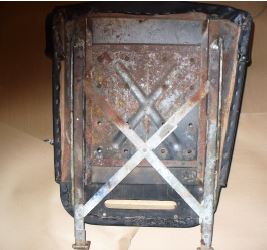
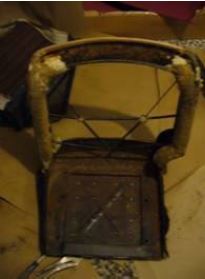
just drop me and e-mail. Dismantle
the seats noting how the original or re-upholstery was done
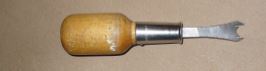
A
professional staple remover helps but is not necessary
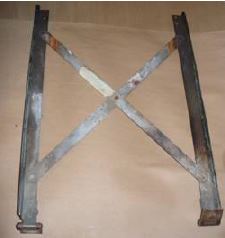
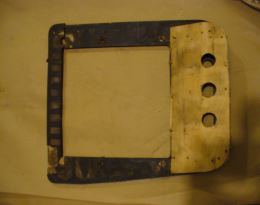
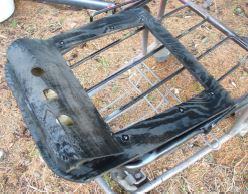
It is best
to have the seat rails cad plated
If the seat rail screws will not come out it is because the captive nuts
have broken
loose from the
plywood, simply drill the head off.
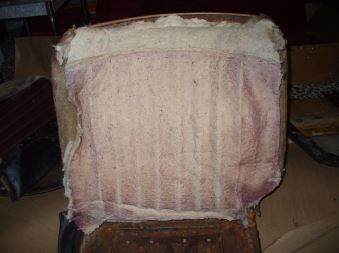
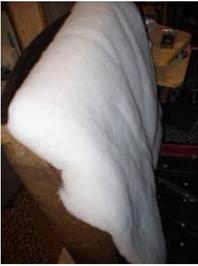
The “Horse hair”
stuffing inside will be covered with “mouse nest” cotton
The “Horse hair”
stuffing will have sunk backwards particularly at the top.
Retain
the original cotton and felt stuffing that surrounds the
perimeter if possible.
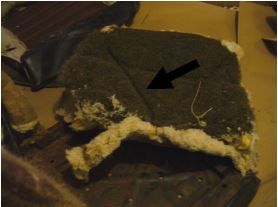
The seat
bottom my be salvageable or may have to be remade.
Getting the exact measurements is
essential.
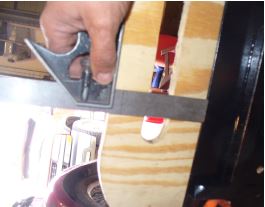
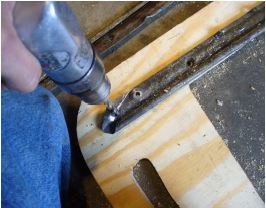
Use the rails to guide the drill.
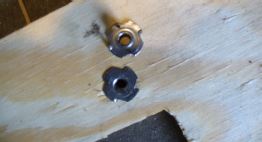
Captive nuts are inserted.
I painted the finished wood to help
preserve it.
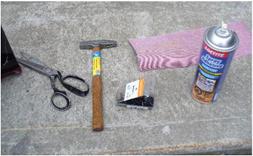
Tools for re-upholstering: very good scissors, tack
hammer (grind the surfaces flat not
convex), spray glue, box
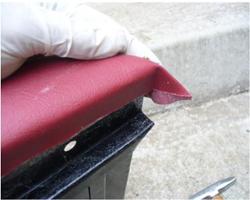
of tax and the first piece of vinyl.
trim the vinyl to shape
of the top edge of the seat frame but leave at least 2 in. to
fold
over.
MGTF SEAT RECOVERING . . . 2
Almost ready to fold over.
Notch
the vinyl to fit around the front edge of the seat back and fold
it over.
Remember that the spray glue must be on both
surfaces and should be allowed to
almost dry before sticking. Rolling or gentle hammering
with a wooden mallet will
ensure a good stick were
required.
The bottom
edge is folded under the seat bottom frame.
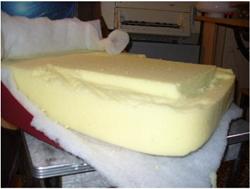
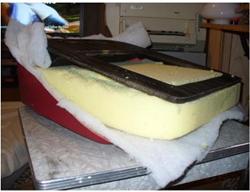
Now for the seat cushion the upholsters padding can be
split to prevent too thick of a
padded look.
I used Moss foam and found that it fit just fine. A
single split layer of filler covers the
top of the foam.
(Addendum: In use I found the Moss foam too soft. On my next
one I will try to get
denser foam or salvage the old foam
with high density foam inserts stuffed into the
original foam’s
cast hollows . . . I saw this as a tip somewhere and can nor
remember
where so can not give credits for it.)
the foam must be trimmed a bit with a bread knife to fit the wooden seat
bottom.
The wooden frame is
place over the trimmed foam.
28. The cover appears to be too small but the foam can be
compressed and stuffed
inside.
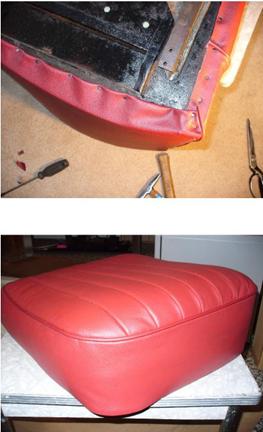
Now pull the material over the bottom
of the seat and tack but do not drive the tacks
home yet.
Now for the seat back This is the hardest
part. I used a 18 in square of foam and
covered it with upholsters fill split in
1/2
A bit of the foam must be trimmed to fit the “dog leg” on the
inside of the seat back.
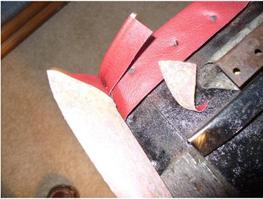
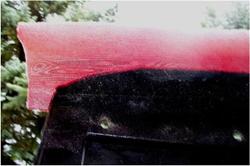
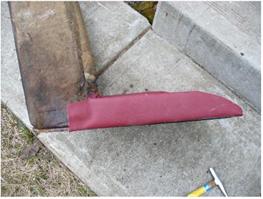
The old black vinyl seat shows the typical slanted top that seats
develop with time.. the red seat show the squared off effect
that was original. This and getting the top of the seat wrinkle
free is the biggest problem of doing the seats.
MGTF SEAT RECOVERING . . . 3
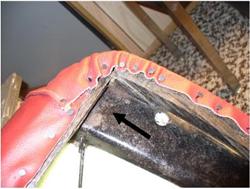
Both sides have the seam cut.. On the original upholstery
the leather was cut on the
dotted line but I was afraid to do this as there is then
no way of going back and
relieving the seam worked perfectly.
It just did
not fit. I had to cut the seam that is at the top side of the
inner seat back. Since it is impossible to machine sew this
again I replaced the stitching through the top piece of leather
only by hand, following the original machine holes. I then let
the top piece of leather
overlap the bottom piece. This approach gave me a wrinkle free
finish but the seam is
not closed just overlapped. Since this is to the inside and
against the other seat I do not believe that it will ever
be noticed.
This shows the overlapped seams from
the back. Each little wrinkle must be pulled
further and tacked. The tighter
it is the fewer wrinkles.
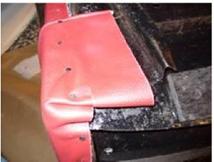
The side of the seat back is tacked under the seat
bottom.
Note triangular piece cut from edge to make it fit.
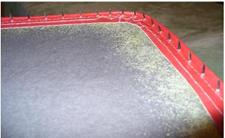
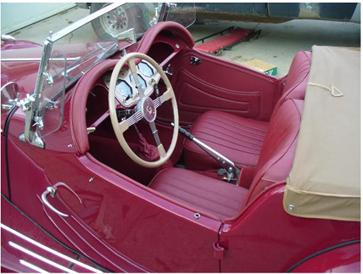
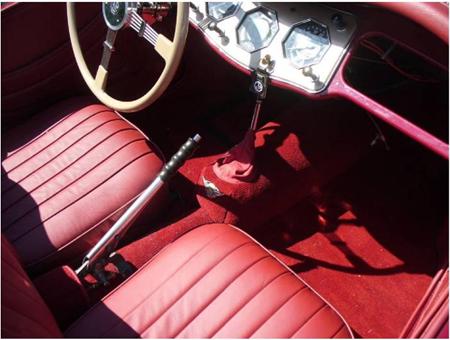
The finished job has
received many compliments especially about the seat tops being
square and not sloped down at the front edge. Below – same car but
different light shows the color closer to correct..
Ttalk.info
MGTF Seat Recovering
by John Crawley
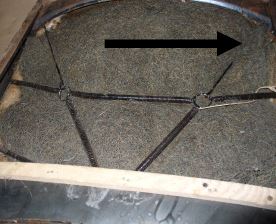
 The
indents show how the stuffing has failed. It can not be reused
The
indents show how the stuffing has failed. It can not be reused
 Glue both the vinyl back and the seat frame with spray glue.
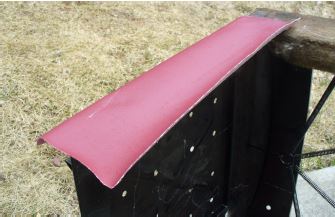
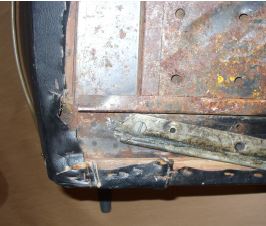
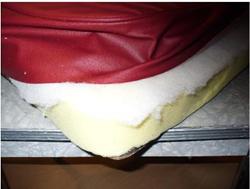
 A thin felt is glued under the vinyl on the bottom side of the seat frame
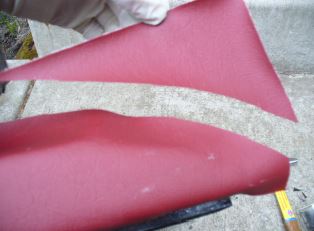
 The
finished bottom part of the seat frame.
The
finished bottom part of the seat frame.
![]() The
piece that was trimmed to make the wooden platform fit is shoved
under the edge
of the wood to add a little extra under the leg support.
The
piece that was trimmed to make the wooden platform fit is shoved
under the edge
of the wood to add a little extra under the leg support.
 The
finished cushion . . . If you have wrinkles just pull it tighter
around the bottom. Remove tacks and re-pull if you have to. When it is perfect, hammer the
tacks home.
The
finished cushion . . . If you have wrinkles just pull it tighter
around the bottom. Remove tacks and re-pull if you have to. When it is perfect, hammer the
tacks home.
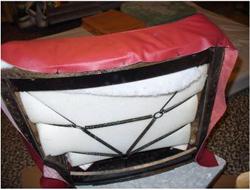
 Fill
is pressed between the sides of the seat back. You can see that
the original felt
and horse hair was
usable. The top of the foam is squared off using extra fiber
fill
Fill
is pressed between the sides of the seat back. You can see that
the original felt
and horse hair was
usable. The top of the foam is squared off using extra fiber
fill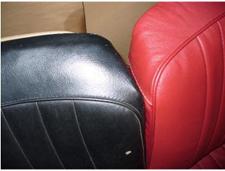

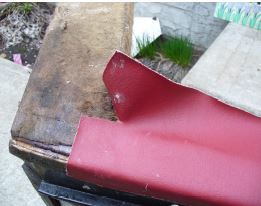
![]() The
seat back seam must be cut from the bottom up to this point to
allow the center
portion to pull under the seat back. At this point I then
machine sewed the seam to
prevent it from pulling out further but this can be done by
hand.
The
seat back seam must be cut from the bottom up to this point to
allow the center
portion to pull under the seat back. At this point I then
machine sewed the seam to
prevent it from pulling out further but this can be done by
hand.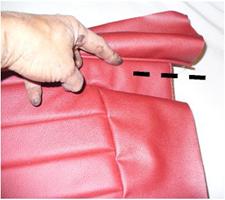
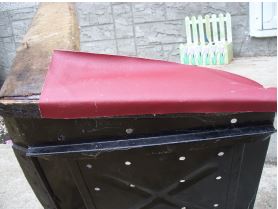
 Moss’s
only instruction was to locate the top of the Dog Leg in the
correct spot and start there
when positioning the back cover. It works. Start tacking If you
get wrinkles along the top just pull the leather tighter.
Remember that bruit force is not what you want. work the leather
with the palm of your hand to warm and shape it into place do
not drive the4 tacks home
until you ar 100% satisfied. I left the seat back overnight
several time to allow it to stretch into shape. Align the
vertical narrow panels of the
back with the narrow panels
of the seat bottom.
Moss’s
only instruction was to locate the top of the Dog Leg in the
correct spot and start there
when positioning the back cover. It works. Start tacking If you
get wrinkles along the top just pull the leather tighter.
Remember that bruit force is not what you want. work the leather
with the palm of your hand to warm and shape it into place do
not drive the4 tacks home
until you ar 100% satisfied. I left the seat back overnight
several time to allow it to stretch into shape. Align the
vertical narrow panels of the
back with the narrow panels
of the seat bottom.
![]()
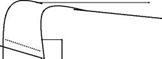
![]() My rather crude drawing of how the
horizontal side seam is cut and then overlapped
on the under piece. The dotted
line shows the seam that I replicated by hand. Much
care is required to do this but it can be done.
My rather crude drawing of how the
horizontal side seam is cut and then overlapped
on the under piece. The dotted
line shows the seam that I replicated by hand. Much
care is required to do this but it can be done.